Easy Fall Front Porch Decor Using Pampas Grass

Can you ever have enough pumpkins during Fall? I LOVE decorating for Autumn and if you are like me, it all begins with a pumpkin splurge at my local Trader Joes. This whole production starts relatively small, but each time I shop between now and Thanksgiving, I rescue another pumpkin from the store to come join my other squash friends.

So here you have my 1st attempt of front porch decor. I like to think of this as my decor base and as Halloween approaches, more fun things will trickle in and then get packed away but this color scheme along with all of my squash will stay constant until Christmas decor arrives.

Speaking of color schemes, I painted my front doors yellow a few years ago and I love the color. However, sometimes, especially during the Christmas season, the yellow can look out of sorts. Of course orange and yellow go together, specifically during Fall but this year I decided to downplay the traditional pumpkin orange color a bit and go more yellow and purples for a moodier look.

IMG_3662.jpg

Find your own color story.

things don’t always have to be the traditional palette

To take things a little further, I added the pampas grass to give things a little drama. Pampas grass grows wild near my house and right now, it is busting out everywhere. For this set of 8 fronds, I drove around until I found a full crop in the parking lot behind my local grocery store. Shhh, don’t judge, no one will miss it!

I just stuck them in the planter but to ensure your pampas grass stays dried and perfect, you may want to consider wrapping the base of each frond with plastic wrap, floral tape or anything really that would keep the base protected from the dirt, (just the. bottom 2”-3” that will go into the dirt). As for the pampas grass, it will dry just fine upright on it’s own but when you notice it is fully dried out, you can give it a little mist of aerosol hairspray to preserve it long term.

So that’s it! Fun right? Happy Autumn everyone!

An Anthropologie Forged Metal Table Numbers Dupe

A few years ago, a bride came to me with a problem. She had found these forged metal table numbers at Anthropologie but the number count only went from 0 to 9 and she had 18 tables. In addition, we needed to obviously keep the cost down but also make sure they were not too heavy so they wouldn’t tip the centerpieces over. I love a good challenge and so back to my think tank (my bathtub) I went.

The Finish: I had recently painted a cap on my tub to match the faucet. Those metallic spray paints come in every metal finish and that is all I would need to make these look like real forged metal, well that and a little paint to rub in the corners so they looked tarnished and authentic. See what great thoughts come in the tub!?

The Weight Issue: So there we were with a finish in mind but we had to also solve the issue of weight. If they were too heavy, we risked them falling out of the centerpieces. This is where I came up with Model Magic made by Crayola. Basically it is a super light weight air drying foam clay and you can do so much with this medium!

Cost: Well Model Magic cost about 20$ for a tub of three packages. I could make about 4 numbers out of one pack. Not too shabby!

The only other real expense was the numbers. Using these hard cardboard numbers allowed me to keep the font consistent and I can reuse them!

So there you have it! Dilemma solved- Have Society Picnic just make them- I’m no blacksmith but I can certainly make something that looks like metal. Check it out!

IMG_3368.jpg

Such a fun project!

I can think of a million uses for these. Gift tags, initials, a “happy birthday” garland or a holiday garland...Just to name a few.

clay numbers.jpeg

Romantic Illuminated Floating Floral Centerpiece ; & it’s as Simple as it looks

As we are nearing the end of Summer, I am ready to say goodbye to days in the hot sun, popsicles, and flip flops. I am anxious for cozy socks, the smell of hot soup on the stove and early sunsets.

We are about to have our last Summer soirees this weekend and the idea of creating a centerpiece just seemed a little too contrived this time of year. This is one of those arrangements that requires nothing more than a few floating candles, blooms, and a shallow bowl of water. In a sense, I think it perfect as a good bye to one season and hello to the next.

  • Now if you did want to complicate things or perhaps you wanted this to last longer than one night… You can dip the bottom of the flower (not the petals) into warm wax (not too hot- you don’t want to scorch them). However, if you are looking to just keep things looking good for 3-5 hours, you should be good to go with just a fresh cut flower in water.

8 Ways To Style Your Sideboard The Next Time You Need a Change


I don’t know about you but sometimes, I just need a little change up in my home. Whether you are working with a sideboard, a buffet, a console or even a credenza, here are 8 great options for a little refresh.

Not sure what you have? To be quite honest, I didn’t know the difference between all of these. There are so many names and yet they all seem to serve the same function! I found this article helpful as I was trying to distinguish the difference between a buffet and a sideboard.


Sorry for the quick post. I am on a little vacation but wanted to make sure to get something out to you all. Happy Friday everyone!

Art Images are Original Paintings available on Etsy; LITTLE RED CHAIR ART

The Process of Planning a Perfect Event

If practice makes perfect than
precise planning makes perfect parties possible!

As a bride and groom wake up on their wedding day flooded with emotions, so does Society Picnic! It has been VERY busy this week taking on florals as well as stying and coordinating a small intimate wedding at El Adobe in San Juan Capistrano.  

Can I be honest? I love taking on an entire event, especially the small ones.  Maybe it's a control thing but I can take note of the client's needs and wants and then plan the entire event from start to finish.  In the end, everything looks and feels cohesive and exactly how we envisioned it, and then some.  I think that is exactly why I have made sure that Society Picnic offers a whole suite of services!  I love a whole package and literally wrapped up with a bow!  

So what did Society Picnic offer for this small but mighty intimate wedding for 40 guests? 

Printables:

  • Invitation design

  • Menu Card

  • Table Seating sign

  • Table numbers

  • leather tags for favors

Florals:

  • boutonniere,

  • bridal bouquet,

  • table florals,

  • cake florals,

  • alter florals,

  • reception florals

  • minis

Coordination:

  • Consultation

  • Mood board/ planning

  • Event floor plan/ flow pattern

  • Timeline

  • Set up

  • Event Coordination- during event

  • Break down

Here is to Loree and Bill and a very happy life ahead! Cheers to the happy couple and thank you for allowing me to be part of your big day! xoxo

If you or someone you know may be in need of my services, I am only a text or call away!

Special thanks to El Adobe in San Juan to their amazing staff and to David Adele for your amazing acoustic guitar skills! If you are in need of an amazing musician for your next event- give David a call!

IMG_2203 2.jpg

See more on Insta!

Gallery Block
This is an example. To display your Instagram posts, double-click here to add an account or select an existing connected account. Learn more

The Creative Spiral VS The Creative Process

Have you ever been so awe struck by an interior design photo that it inspired you to change it all? Recently, during a quest for kitchen inspiration (yes kitchen, not bedroom), I found this photo on the blog, “Damsel in Dior.”

The color of the accent wall was so beautiful in contrast with the wooden bed frame and the neutral bedding. WOW! There was no going back, I needed to do this! What a perfect post! This of course sent me spiraling into a steady course of crazy steps with only one day to conquer. It was my one day challenge so I could post it today! Now before I share and tell, I must preface that I am typically an over thinker when it comes to decision making, especially in my own home (and especially in client’s homes) but for some reason this specific photo just forced me into overdrive!

If you haven’t picked up on this…
KIDS, DO NOT TRY THIS AT HOME!


Let’s assess the steps within the spiral…

Step one:

After my first trip to Home Depot, and a very friendly chat with the lady behind the counter about her ballet classes, I came home with what I was sure was the exact color in the photo.

8.jpg

Step two:

Prepping the space meant moving the bed which then sent me into another search on Pinterest on bed frame hacks. I have a wonderful headboard but really want a bed frame not on metal slats with wheels, so bad! It has been a long and tiring road trying to find the perfect frame to go with my authentic walnut mid-century modern headboard that I WILL NOT GIVE UP! No luck but I did find a way to upholster and attach legs to your box spring so it looks like an upholstered bed frame… maybe a temporary solution? Take a look- pretty clever actually.

Step three:

I ponder… if I drive to just my local fabric store, perhaps I will find something simple? How hard could it be to find something simple but in the right color, in the right texture and in the right price range… 3 stores later I came home with nothing, feeling defeated so I just paint the wall.

Step four:

Well the paint is a little too blue and I really wanted it to be a little more green so I went to my hyper local paint supplier; my garage. I had a mustard yellow that would most certainly work. Now mixed, I slapped up a second coat only to find, it really was not exactly the right tone, it needed more of the mustard added to make it the right deep sea teal green I envisioned.

Step five:

Well the paint looked amazing so now I just needed to put the bedroom back together but the headboard needed to be reinforced a little better so off to Home Depot again for the proper anchoring hardware.

Step six:

It’s now dark and the lightbulb went out but luckily my drill has a light so I hang the headboard by flashlight but it’s just a little too far to the left so I start over.

Step seven:

I get the bedding on, place the nightstand back and the art work above and though it all looks pretty good, I think I need to look harder for the bed frame and perhaps new nightstands.

Step eight:

I shop online and I order nightstands. Of course they are not the right color but because the price is right, I won’t feel bad painting them when I get them. So that is a win but I still can’t find the right bed frame so I finally give up and go to sleep to the faint smell of three fresh coats of sea green paint.

Step nine:

I wake up and I realize that during all of this… I forgot to take pictures for the post! Seriously!

7.jpg

The Moral of the story…

So what started out as a “how to,” has become a perfect, “what not to do.” I will say I do love the wall color and the whole palette really! I just wished I had taken more time to plan things out and have all of my materials together. I am still short a bed frame, a plant on the left side of the bed, and a bench at the end of the bed that wasn’t just recovered in a pinch. Had I planned things out, I would have had a mood board, assessed all of my colors and textures together including fabrics, wood color, metals and my rug. This would have been the right “creative process,” instead of a “creative spiral!”


I will chalk this one up to a learning experience, I suppose.

We live and learn!

Xoxox Sarah


When to Reupholster or Recover Your Furniture

When I was in high school, I could never find the right dress for homecoming or prom. While most kids were headed to the local department store, I was begging my mom to sew the dress I saw in 17 Magazine in my favorite color. The only reason my mom did this was because it was less expensive to make a dress than to buy one (or the idea of shopping with me was just so painful).

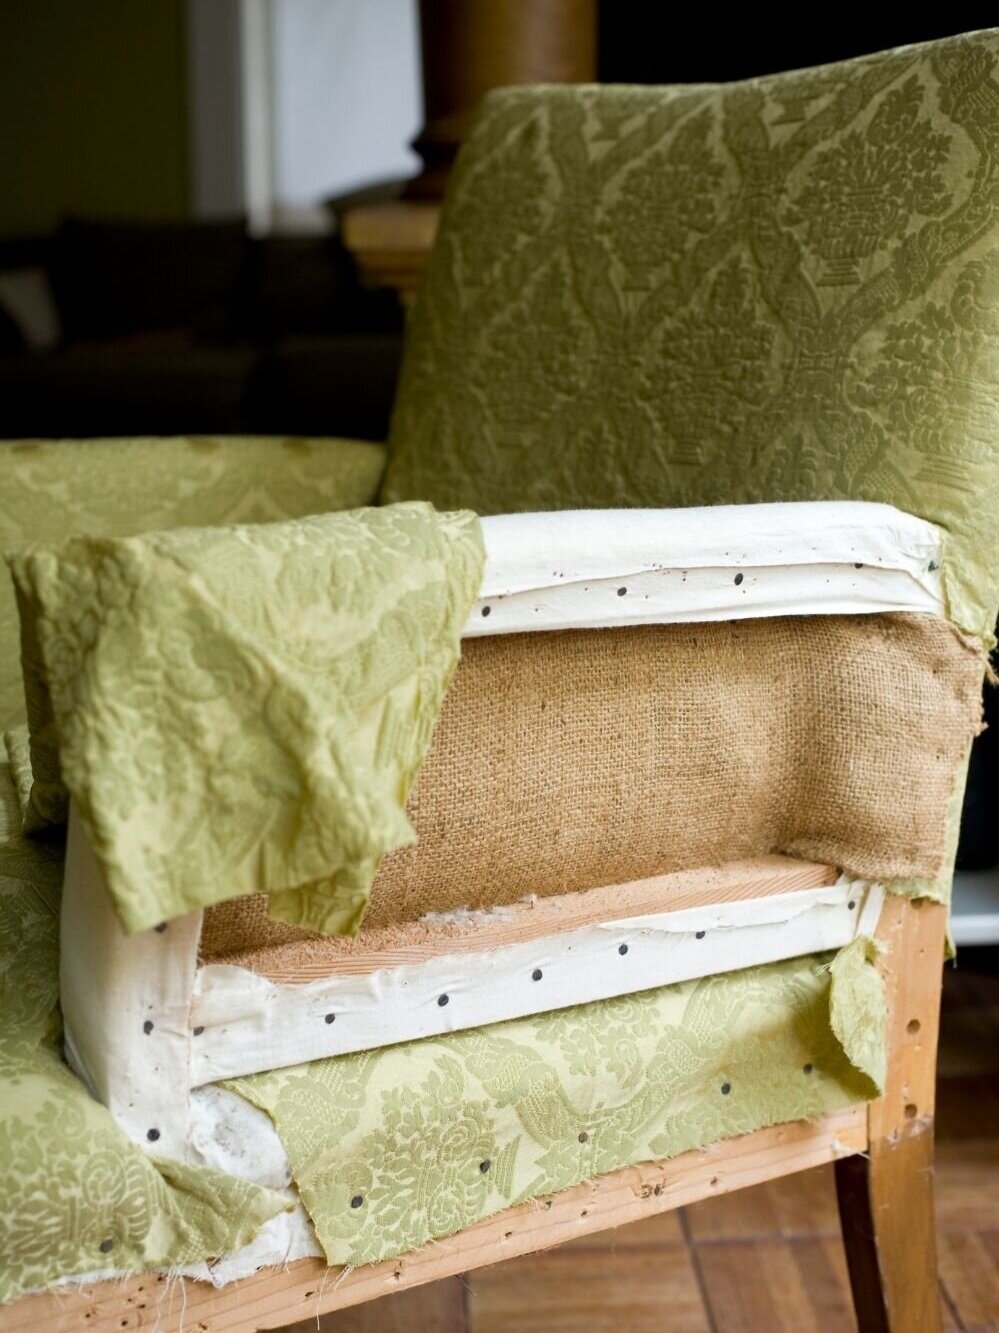
Just as the fashion industry has changed where you can buy a prom dress for less money than the cost of 3 yards of organza, the same goes for furniture. You basically have three options when it’s time to consider a refresh on your furniture and it’s important to understand them all.

Copy of Ocean Wellness and Self-care Pinterest Video Pin (1).jpg
  1. Recover: Just as it sounds, you are simply buying fabric and having someone recover it. This is a less expensive way to do things but don’t cut corners if your piece really needs more than a fresh coat of fabric.

  2. Reupholster: You get the whole enchilada; new foam, batting, ca tune up on the framework if needed and then recovering it. Sometime this can also allow you to change up or update the arm design or feet of your upholstered item too.

  3. Buy New: You get what you pay for in this day and age and therefore, cheap furniture may be readily available to you but it will be a gamble if it lasts. Quality furniture is going to cost more, look nicer and should stand the test of time.

So now that you know what your options are, let’s ask a few more questions to help you decide what’s best for you.

  1. Is the piece of furniture a quality piece of furniture? If your furniture is made before 1965ish, chances are it was made to last. It wasn’t uncommon to think when you bought that dinette set, it was supposed to stay with you from when you were newlyweds to the day you die. This isn’t to say that furniture made after 1965 is all bad either! Investigate the brand name and clues on construction and details to determine if the quality is there. If you strike a gold mine and you do have a quality piece of furniture, chances are that buying something of the same quality today will cost you more than having that sofa recovered.

  2. Is your furniture piece something you love because it has sentimental value? Can you ever imagine your home without it? I don’t care what anyone says, if you have great grandma’s settee from the house she grew up in and you love it with all of your heart, it deserves an automatic, YES, on recovering or reupholstering it!

  3. How many arms does it have? This might sound silly but the fabric is not the only thing that cost a lot. The bulk of your money is going to the labor, specifically those arms or any other small intricate areas that will require detail and craftsmanship.

  4. Are you considering sustainability? Simply put, recovering your upholstered furniture might be more expensive but it supports small business and your local craftsmen while keeping things out of the landfill.

  5. Can’t find anything you like while out shopping? Well, it goes without saying the options are literally endless when you get to choose your own fabric, your own finish and you even get to decide how the cushion will sit. If you are like me with the prom dress, recovering or reupholstering would allow you to end up with a tailor-made creation just right for you!

…The Options Are Endless

All things considered, what did you decide? It’s not easy these days! Furniture is certainly a big investment and stylistically a reflection of who you are as an individual or as a family. I’ve been in this business my whole adult life and even for myself, I have to ask these very questions every time we need to replace or buy new furniture. In the end, knowledge is power! I hope this will help you a bit in your decision making.

All the best,

Sarah


Recent Experience

I recently received quotes from 3 different upholsters on recovering chairs for a client. The chairs were originally Ethan Allen, a reputable company who prides themselves on quality American made furniture. No doubt the chairs were solid but the blue velvet was simply not going to work in the new house.

I was actually impressed that all three upholsters quoted almost the exact same amount, (give or take $25-$50). Clearly there is a formula on time and labor and everyone is pretty in synch. In addition, each upholster asked for the same amount of yardage; also impressive!

I would love to share pricing but every city is different and cost of rent among other things probably ranges from state to state and city to city. I can share however that fabric generally costs between $40-$80 retail if you are ordering and $20-$60 if you are buying ready made cut yardage directly off the bolt. There are some great warehouse places and even fabric outlets online to get fabric $5-$30 but it usually takes some hunting and you will not get all of the info on the fabric such as cleaning codes, wearability and what it’s made of.

UPDATE YOUR HOME DECOR USING WHAT YOU ALREADY OWN!

I don't know about you but I love to shop. It's not so much about acquiring more, but more about the hunt! I am seriously a pro shopper when it comes to home furnishings, art supplies, and party essentials. I know exactly what I like and why, where to source it, how to get it at the best price and where quality takes over quantity. (and vice versa) I LOVE TO SHOP!

Aside from just being a good shopper though, there are times when I stumble upon something so amazing (and usually at an amazing price) and it will inspire an entire room makeover. Do you do that? It doesn't always apply to my home either, it could be a new sweater that prompts me to rethink my entire wardrobe!

Well I think this happens for a reason. I think as we evolve and trends change, so should our spaces, or even our wardrobe! Of course, I am not in a financial place to change up my whole house whenever I have one of these whims but I can tell you a great way to make you feel like you are living in a new space. Just mix things up! You need to deconstruct your home decor and see things from a new perspective.

I like to call it a Home Decor Refresh. The best thing is, it's FREE and it goes something like this...

I promise it works and all of your treasures will thank you for giving them a new view in the house! Be sure to share how it goes. I would love to hear back from you.

Independence Day American Flag Wall Hanging for This 4th of July!

Untitled design (4).png

Every year during the hot Summer on The Fourth Of July, as a nation, we put aside our differences, come together and celebrate the one thing we all appreciate and honor in this country; Freedom! I have the freedom to write this very post, live where I want, say what I want, befriend who I want and even work where I want…THANK YOU FREEDOM! What an incredible gift to live in this country; the good ole' U.S. of A!

Needless to say, the 4th calls for some serious celebration and of course, some home decor flair. However, I must admit, I have endless bins full of holiday decor but my one bin for The Fourth of July is SO sad. So what do you do when your holiday house decor is lacking? You call your friend Tatum for a craft day!

Some of you already know my sweet friend Tatum, crafter extraordinaire, from our Valentine’s Day Mistletoe post months ago. She is my new crafting buddy and therefore the perfect friend to ask over to make an American Flag Wall Hangings with. Now Tatum and I craft very much the same way. We abide by the one “crafter’s golden rule” and never stray from it. The golden rule states: Throw all of the rules out the window! (that’s the rule) Just lay out all of the materials and go for it. For some, who like detailed instructions, clean precise steps and specifics… this may a tough one for you but just try it! This craft can really work for all ages and perfect to call over friends and family for a little catch up visit. I also think this would be a wonderful craft for Summer camp, your 4th of July party, church groups, girl scouts or just a girls night in.

Those old worn out clothes are about to take on a whole new life!

Those old worn out clothes are about to take on a whole new life!

Cut strips in red and whites to make your stripes.

Cut strips in red and whites to make your stripes.


So here are the (very loose) instructions:

Materials:

To get started, we just needed some fun materials, and we were hoping we could just use what we could round up without spending much money. I had a ton of those red wooden beads from Christmas, a bunch of white cording, some guazey white fabric, ribbon, a few red and cream colored shirts from Kevin’s closet (hope he doesn’t notice) along with a few others from my local thrift shop. One thing I loved about using clothes, specifically mens shirts, was that unlike cheap quilting fabric you find at the fabric store, mens button up shirts usually have a print that is on both sides. In addition, you basically get a yard of fabric when buying a men’s large or XL dress shirt for a couple dollars instead of buying fabric usually $7-$20 per yard. I also picked up a few red and blue bandanas at the craft store. In addition to all of this, you will need a dowel, some string or twine, a glue gun, and scissors.

IMG_1310.jpeg
If you want to clean up your top, add a little cording or ribbon to finish it off.

If you want to clean up your top, add a little cording or ribbon to finish it off.

Steps:

  1. Lay out all of your materials. How do you get creative if you can’t see what you are working with?

  2. Figure out how long you want your stripes. I determined my length based on how long of a strip I could get from the men’s shirts. Once you determine this you can gauge how big your blue area should be.

  3. Attach twine or ribbon to each end at least a couple inches in from each end. This is how it will hang later.

  4. Start applying your strips in stripes by either gluing them or tying them on to your dowel. Layer as you go. Not all the lengths have to be the same either but it’s good to have a constant at least for your longer strips.

  5. Add your blue area. Some of us just glued or tied our strips to the dowel and then tied strips of red and white to the bottom of the blue. However, I just laid my blue over my red and white stripes. I thought both ways looked good!

  6. As my mom always says, “An artist knows when to stop.” Once your flag looks pretty full and straight, give it a little haircut at the bottom and then clip any loose strings.

  7. Tatum had glued hers on to the dowel and then added cord to cover it all up. I thought that was pretty smart. Her Mom, Jonne, however knotted hers and left it; it looked pretty cute too!

IMG_1324.jpeg
 

HAPPY
4TH OF JULY EVERYONE!


IMG_0074.jpg

Need a 4th of July Recipe? Check out this post for a Savory Watermelon Salad!


ALL SO DIFFERENT
BUT PERFECT Just the same!


Thank you Tatum, Jonne and my sister Annie for coming to the craft party. Sometimes you just need a little craft day to mix things up! xoxo