
Independence Day American Flag Wall Hanging for This 4th of July!

Every year during the hot Summer on The Fourth Of July, as a nation, we put aside our differences, come together and celebrate the one thing we all appreciate and honor in this country; Freedom! I have the freedom to write this very post, live where I want, say what I want, befriend who I want and even work where I want…THANK YOU FREEDOM! What an incredible gift to live in this country; the good ole' U.S. of A!
Needless to say, the 4th calls for some serious celebration and of course, some home decor flair. However, I must admit, I have endless bins full of holiday decor but my one bin for The Fourth of July is SO sad. So what do you do when your holiday house decor is lacking? You call your friend Tatum for a craft day!
Some of you already know my sweet friend Tatum, crafter extraordinaire, from our Valentine’s Day Mistletoe post months ago. She is my new crafting buddy and therefore the perfect friend to ask over to make an American Flag Wall Hangings with. Now Tatum and I craft very much the same way. We abide by the one “crafter’s golden rule” and never stray from it. The golden rule states: Throw all of the rules out the window! (that’s the rule) Just lay out all of the materials and go for it. For some, who like detailed instructions, clean precise steps and specifics… this may a tough one for you but just try it! This craft can really work for all ages and perfect to call over friends and family for a little catch up visit. I also think this would be a wonderful craft for Summer camp, your 4th of July party, church groups, girl scouts or just a girls night in.
Those old worn out clothes are about to take on a whole new life!

Cut strips in red and whites to make your stripes.
So here are the (very loose) instructions:
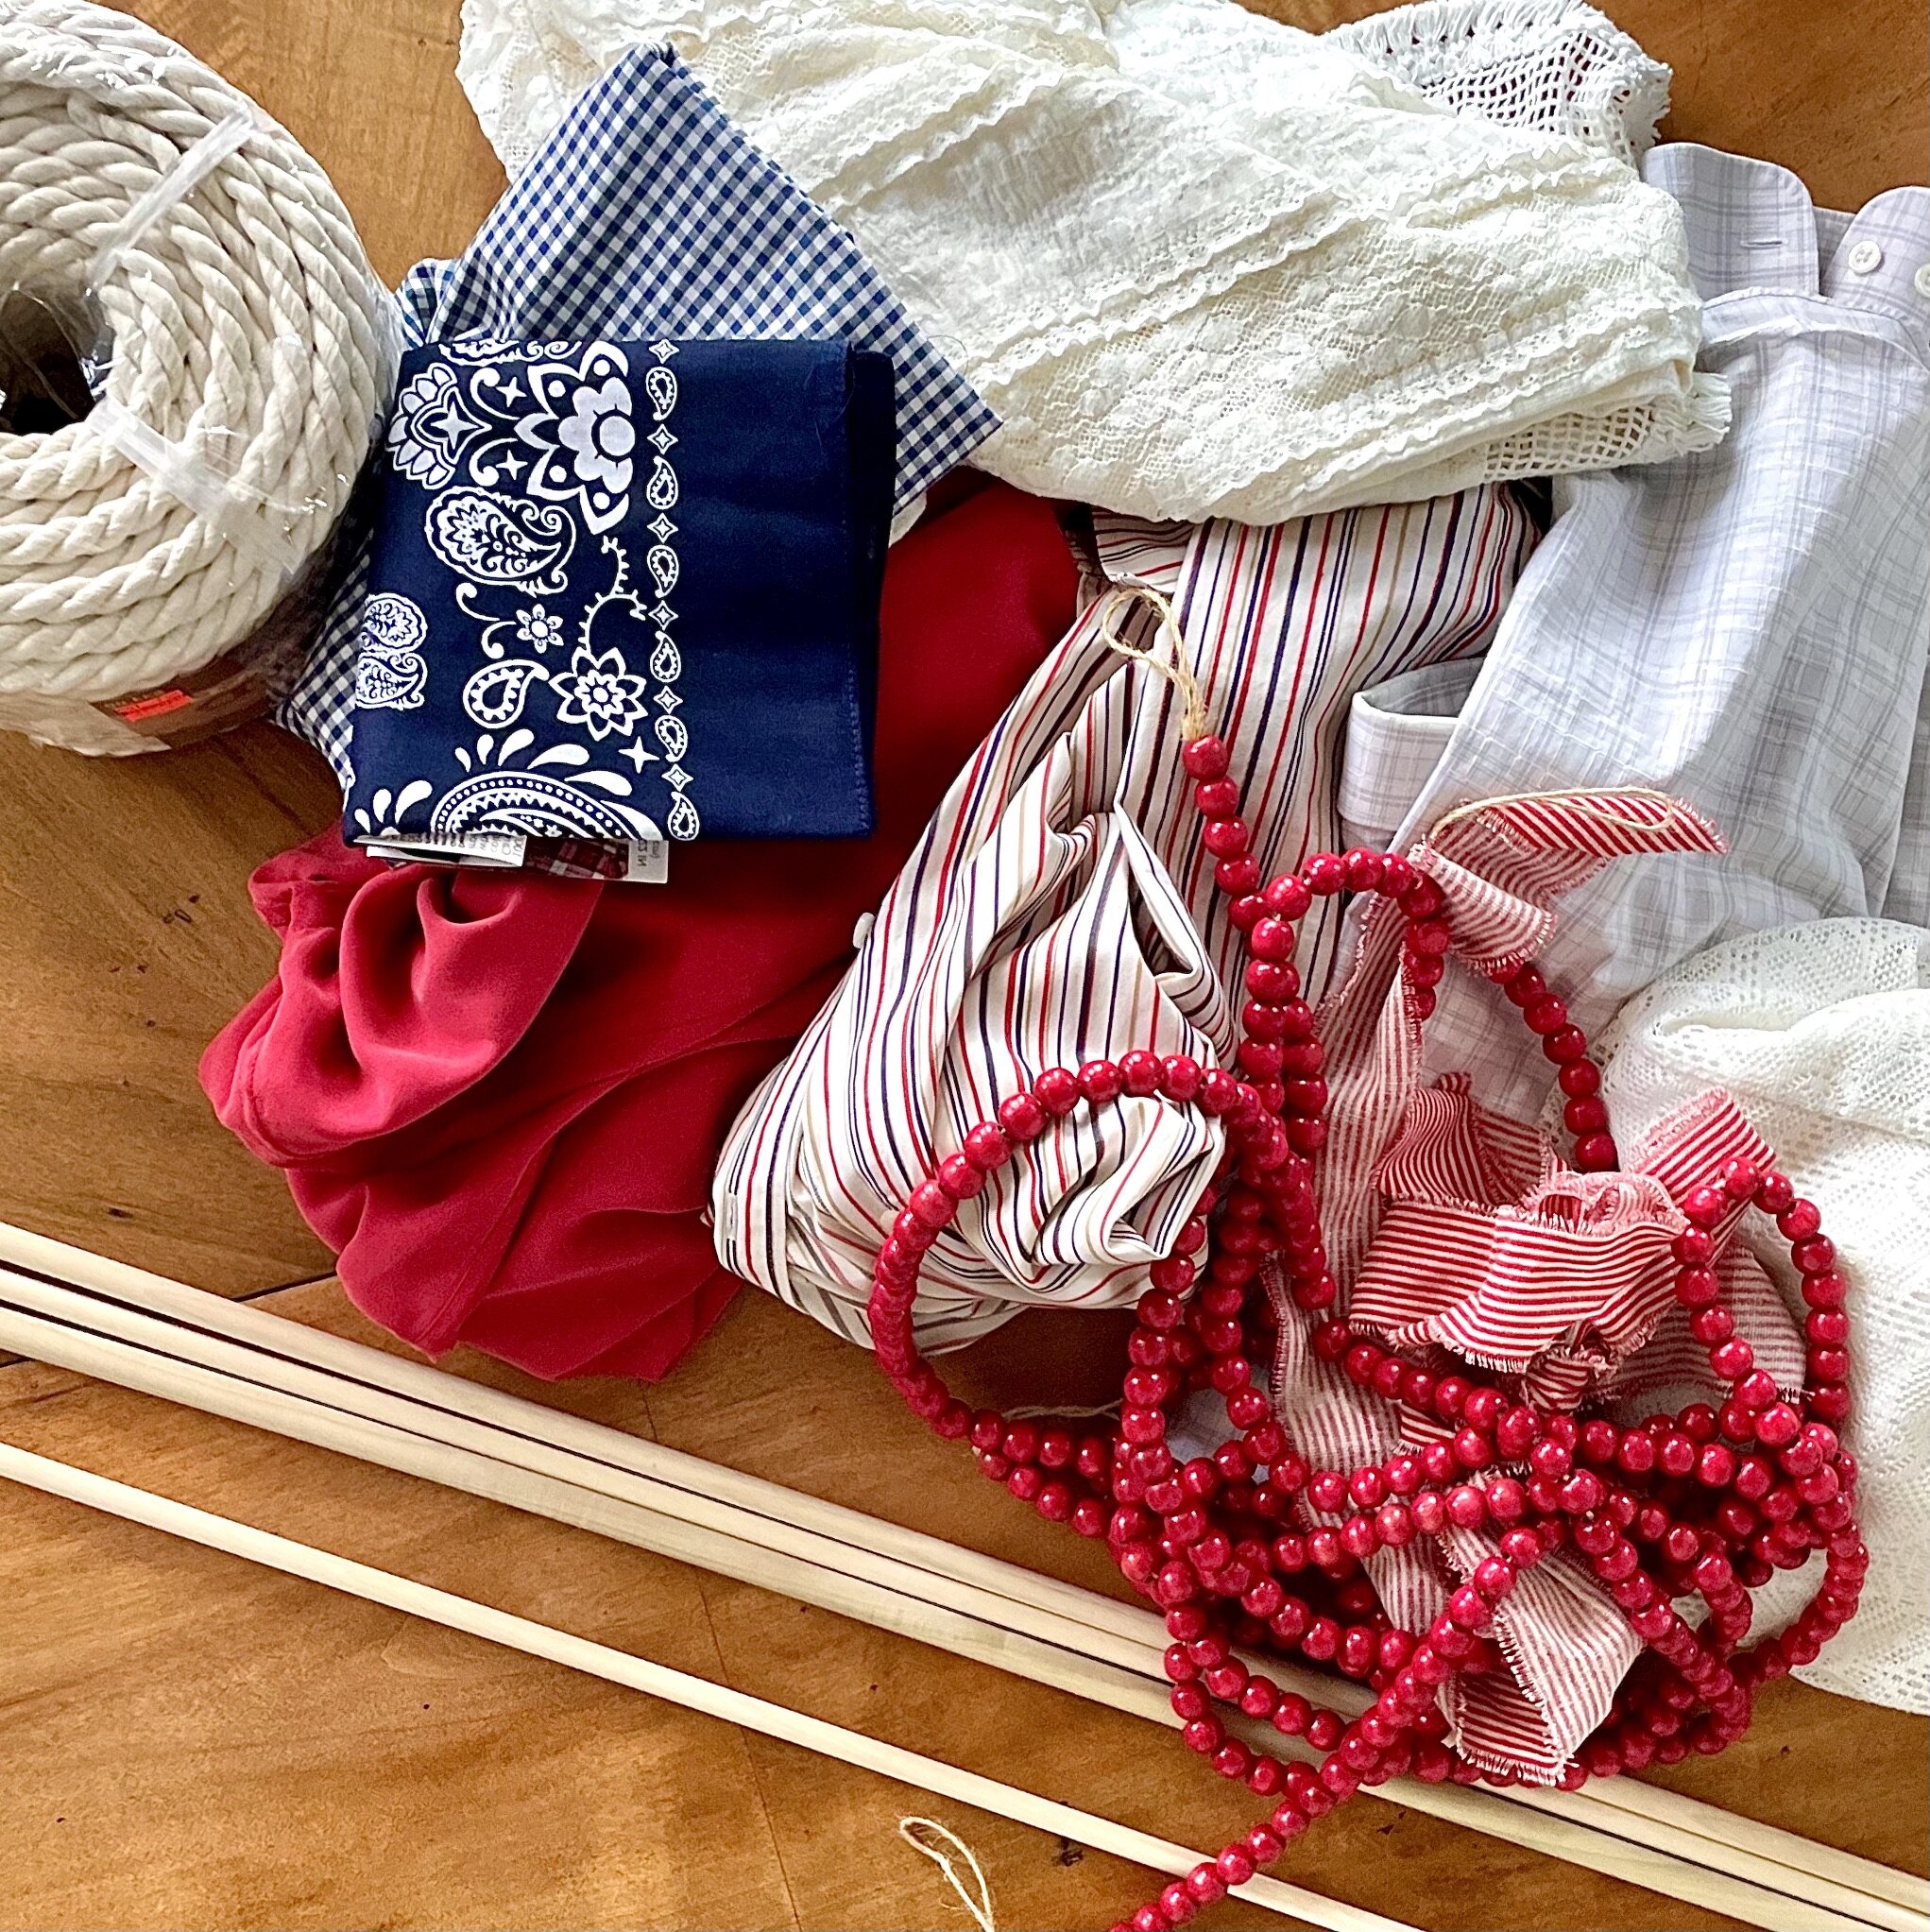
Materials:
To get started, we just needed some fun materials, and we were hoping we could just use what we could round up without spending much money. I had a ton of those red wooden beads from Christmas, a bunch of white cording, some guazey white fabric, ribbon, a few red and cream colored shirts from Kevin’s closet (hope he doesn’t notice) along with a few others from my local thrift shop. One thing I loved about using clothes, specifically mens shirts, was that unlike cheap quilting fabric you find at the fabric store, mens button up shirts usually have a print that is on both sides. In addition, you basically get a yard of fabric when buying a men’s large or XL dress shirt for a couple dollars instead of buying fabric usually $7-$20 per yard. I also picked up a few red and blue bandanas at the craft store. In addition to all of this, you will need a dowel, some string or twine, a glue gun, and scissors.


If you want to clean up your top, add a little cording or ribbon to finish it off.
Steps:
Lay out all of your materials. How do you get creative if you can’t see what you are working with?
Figure out how long you want your stripes. I determined my length based on how long of a strip I could get from the men’s shirts. Once you determine this you can gauge how big your blue area should be.
Attach twine or ribbon to each end at least a couple inches in from each end. This is how it will hang later.
Start applying your strips in stripes by either gluing them or tying them on to your dowel. Layer as you go. Not all the lengths have to be the same either but it’s good to have a constant at least for your longer strips.
Add your blue area. Some of us just glued or tied our strips to the dowel and then tied strips of red and white to the bottom of the blue. However, I just laid my blue over my red and white stripes. I thought both ways looked good!
As my mom always says, “An artist knows when to stop.” Once your flag looks pretty full and straight, give it a little haircut at the bottom and then clip any loose strings.
Tatum had glued hers on to the dowel and then added cord to cover it all up. I thought that was pretty smart. Her Mom, Jonne, however knotted hers and left it; it looked pretty cute too!


HAPPY
4TH OF JULY EVERYONE!

Need a 4th of July Recipe? Check out this post for a Savory Watermelon Salad!
ALL SO DIFFERENT
BUT PERFECT Just the same!

Thank you Tatum, Jonne and my sister Annie for coming to the craft party. Sometimes you just need a little craft day to mix things up! xoxo